How to Get Baby Handprint : A Step-by-Step Guide
To get a baby handprint, press your finger firmly on a smooth surface or use paint or plaster to get a clear handprint. Apply lotion before pressing your hand for a more visible print.
Practice dusting for your own prints first to perfect the technique. If using paint, spread it evenly on the child’s hand and gently press it onto paper, canvas, or board. Massaging the palm and relaxing the hand can help with clenched fists.
Consider using baby-safe paint for fabric or regular baby-safe paint for paper or card. Alternatively, distract the baby while quickly making the handprint with the help of another person.
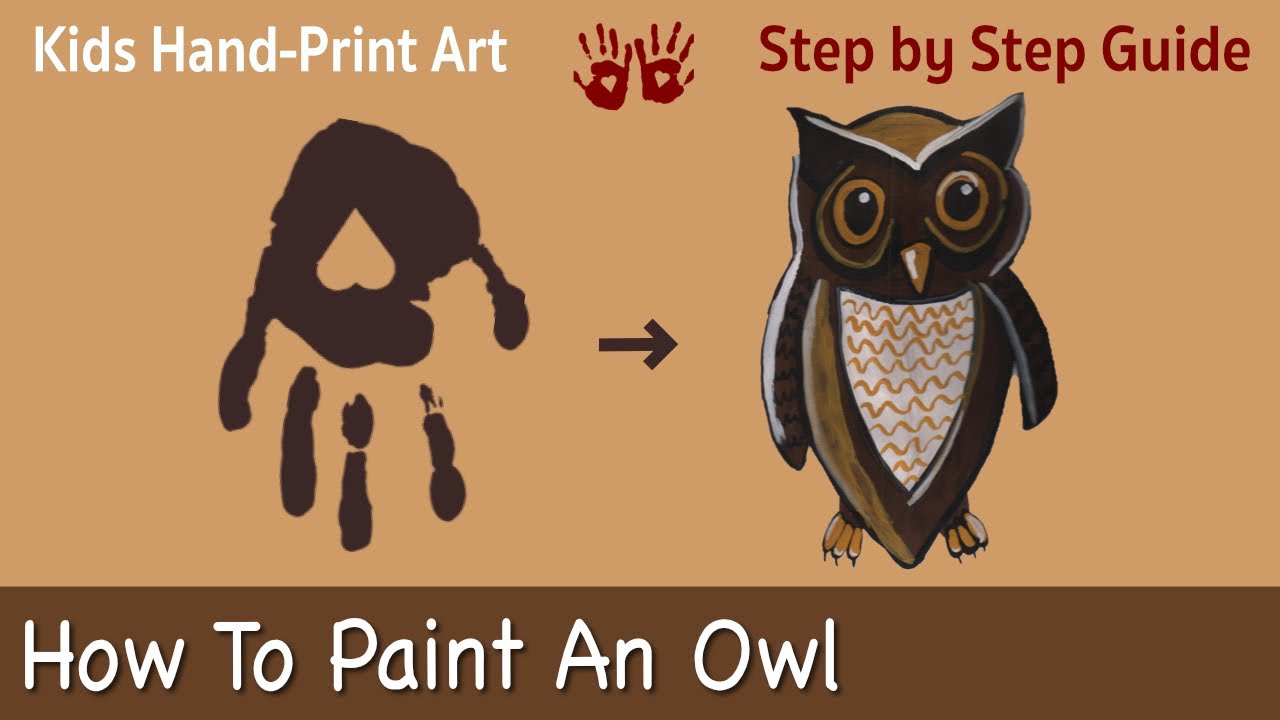
Credit: www.youtube.com
Preparing For The Handprint
Getting a handprint of your little one is a precious keepsake that you’ll cherish for years to come. However, it’s important to prepare adequately to ensure a successful handprint without any frustrations. In this section, we’ll discuss the necessary materials you’ll need, the best time and location to get the handprint, and how to ensure your baby is comfortable and calm during the process.
Gather The Necessary Materials
Before you start, make sure you have everything you need for a stress-free handprint experience. Here’s a list of materials you should gather:
| Materials | Description |
| Baby-safe non-toxic paint or ink pad | Choose a paint or ink pad that is safe for your baby’s delicate skin. It should be non-toxic and washable for easy clean-up. |
| Smooth surface | Select a smooth surface like a sturdy paper, canvas, or a baby-safe ceramic mug to get a clear handprint. |
| Damp cloth or wipes | Have a damp cloth or baby wipes nearby to clean your baby’s hand after taking the handprint. |
| Towels or bibs | Keep a stack of towels or bibs handy to protect clothing and surroundings from any accidental mess. |
Choose The Best Time And Location
The right time and location can greatly influence the success of getting a baby handprint. Consider the following when choosing the ideal time and place:
- Select a time when your baby is well-rested and fed, as a tired or hungry baby may not be cooperative during the process.
- Find a location with good lighting that allows you to clearly see the handprint details.
- Ensure the room temperature is comfortable for your baby to prevent any discomfort or fussiness.
Ensure The Baby Is Comfortable And Calm
Keep your baby comfortable and calm to create a relaxed environment for the handprint. Follow these tips to ease any anxiety:
- Choose a time when your baby is in a calm and contented mood.
- Engage your baby in a soothing activity prior to taking the handprint, such as gentle play or singing lullabies.
- Ensure the hands are clean and dry before applying the paint or ink pad.
- Maintain a gentle grip on your baby’s hand to guide it onto the surface without applying too much pressure.
By preparing adequately and creating a comfortable environment, you’ll increase your chances of getting a beautiful and memorable baby handprint. Follow these guidelines to ensure a smooth and enjoyable experience for both you and your little one.
Using Paint For Baby Handprints
Using paint for baby handprints is a fun and creative way to capture those precious little hands. Not only does it make for a beautiful keepsake, but it also allows you to create a lasting memory of your baby’s tiny hands. However, when it comes to using paint on your baby’s hands, it’s important to prioritize safety and ensure that you’re using non-toxic paint that is safe for your baby’s delicate skin. In this blog post, we will discuss how to select safe and non-toxic paint for baby handprints, how to prepare the paint and tools, and how to apply the paint to your baby’s hand and make the handprint on the desired surface.
Select Safe And Non-toxic Paint

When choosing paint for baby handprints, it is crucial to select a paint that is safe and non-toxic. Babies tend to put their hands and everything else in their mouths, so using paint that is free from harmful chemicals is essential. Look for paints that are labeled as non-toxic, water-based, and specifically designed for use on baby’s skin. These paints are usually made from natural ingredients and are safe for babies to have direct contact with their skin.
Prepare The Paint And Tools
Before getting started, gather all the necessary tools and materials. You’ll need the chosen non-toxic paint, a shallow dish or plate to hold the paint, a foam brush or sponge, and some damp towels or wipes for easy clean-up. Make sure you have a comfortable and well-lit space to work in, as working with a wiggly baby can be challenging.
Apply The Paint To The Baby’s Hand
Once you have everything ready, it’s time to apply the paint to your baby’s hand. Gently dip the foam brush or sponge into the paint and evenly coat your baby’s hand with a thin layer of paint. Be sure to cover the entire palm and each finger, but avoid applying too much paint as it may smudge or blur the handprint.
Make The Handprint On The Desired Surface
Now that the paint is applied to your baby’s hand, carefully guide their hand to the desired surface where you want to create the handprint. It can be a piece of paper, canvas, or even a ceramic mug. Place their hand gently on the surface and press down lightly to make sure each part of the hand makes contact with the surface. Hold their hand steady for a few seconds to create a clear and defined handprint.
After making the handprint, carefully lift their hand from the surface. You can use a damp cloth or wipes to clean their hand immediately to prevent any accidental smudging or getting paint on their clothes. Allow the handprint to dry completely before handling or framing it if desired.
Using paint for baby handprints is an excellent way to create a lasting memento of your baby’s adorable little hands. Just remember to choose safe and non-toxic paint, prepare the paint and tools, apply the paint to your baby’s hand, and make the handprint on the desired surface. With proper preparations and care, you can create a beautiful keepsake that you and your baby will cherish for years to come.
Creating Handprints With Alternative Methods
Discover alternative methods for creating baby handprints, including using dusting techniques to find accidental prints around the house or using paint or plaster to make intentional handprints on paper or canvas. Learn tips and tricks for getting a good handprint, such as massaging the palm and relaxing the hand to prevent clenched fists.
Say goodbye to messy attempts and create the perfect keepsake with these expert tips.
Creating Handprints with Alternative Methods When it comes to getting your baby’s handprint, there are various alternative methods you can explore. These methods provide different options for capturing your little one’s precious handprint, whether you want to use ink pads or clay. In this section, we will discuss step-by-step instructions for each method and highlight the pros and cons of using ink pads versus clay. Explore options such as ink pads or clay Ink pads and clay are two popular alternatives for creating handprints that are safe and easy to use. Let’s take a closer look at each method: 1. Ink Pads: Using ink pads is a quick and mess-free way to capture your baby’s handprint. Here’s how you can do it: a. Start by ensuring that your baby’s hand is clean and dry. b. Gently press your baby’s hand onto the ink pad, making sure to cover the entire palm and fingers. c. Place a piece of paper or cardstock underneath your baby’s hand and press it down firmly to transfer the handprint. d. Lift your baby’s hand off the paper carefully to reveal the handprint. 2. Clay: Clay is a more traditional method of creating handprints and offers a three-dimensional effect. Follow these steps to create a clay handprint: a. Choose a non-toxic and air-drying clay suitable for baby handprints. b. Knead the clay to make it soft and pliable, ensuring there are no lumps or air bubbles. c. Flatten the clay to your desired thickness, but make sure it’s thick enough to capture the details of your baby’s hand. d. Gently press your baby’s hand onto the clay, applying even pressure to ensure a clear impression. e. Carefully remove your baby’s hand from the clay, making sure not to smudge the handprint. f. Allow the clay to dry completely according to the manufacturer’s instructions. Follow step-by-step instructions for each method Now that we have explored the options of using ink pads or clay, let’s discuss step-by-step instructions for each method: Ink Pads: 1. Ensure your baby’s hand is clean and dry. 2. Press your baby’s hand onto the ink pad, covering the entire palm and fingers. 3. Place a piece of paper underneath your baby’s hand and press it down firmly. 4. Lift the hand off the paper carefully to reveal the handprint. Clay: 1. Choose a non-toxic and air-drying clay suitable for baby handprints. 2. Knead the clay until it becomes soft and pliable, without any lumps or air bubbles. 3. Flatten the clay to your desired thickness, making sure it’s thick enough to capture the details. 4. Gently press your baby’s hand onto the clay, applying even pressure for a clear impression. 5. Carefully remove your baby’s hand from the clay without smudging the handprint. 6. Allow the clay to dry completely following the manufacturer’s instructions. Discuss the pros and cons of each method While both ink pads and clay are effective methods for creating handprints, they each have their pros and cons: Ink Pads: Pros: – Easy to use and mess-free – Provides a clear and precise handprint – Quick drying time, with immediate results Cons: – Limited color options – Not suitable for three-dimensional handprints Clay: Pros: – Offers a three-dimensional effect – Can be customized and decorated – Creates a lasting keepsake Cons: – Longer drying time – Requires careful handling to avoid smudging In conclusion, whether you choose to use ink pads or clay, both methods offer unique advantages when it comes to creating your baby’s handprint. Consider your preferences and the desired outcome to select the method that best suits your needs.Preserving And Displaying Baby Handprints
Preserving and displaying baby handprints is a wonderful way to capture a precious moment in time. These tiny imprints serve as a cherished keepsake that bring back memories of those early years. In this section, we will explore the importance of preserving the handprint, different display options to consider, and how to add personalized touches to make each handprint unique.
Learn How To Protect And Preserve The Handprint
Protecting and preserving the baby handprint is essential to ensure it lasts for years to come. Here are some key tips to keep in mind:
- Choose high-quality materials: To prevent fading and deterioration, it’s important to use archival-safe materials. Acid-free paper or canvas and non-toxic paints or inks are ideal choices.
- Properly clean and dry the hand: Before making the handprint, clean the baby’s hand using gentle soap and warm water. Ensure the hand is thoroughly dry as any moisture can affect the preservation process.
- Consider using a sealant: Applying a sealant to the handprint can provide an extra layer of protection. Be sure to choose a sealant that is non-toxic and won’t alter the appearance of the handprint.
- Store in a safe place: Once the handprint is dry, protect it from sunlight, dust, and humidity by storing it in a frame, shadow box, or acid-free plastic sleeve.
Consider Different Display Options
Displaying the baby handprint enables you to showcase this special memento in your home. Here are a few display options to consider:
- Frame it: Placing the handprint in a frame is a classic and timeless way to display it. Choose a frame that complements your home decor and opt for UV-protected glass to prevent fading.
- Create a shadow box: Shadow boxes are a great option for displaying the handprint along with other memorabilia such as a baby photo or a small memento.
- Design a gallery wall: If you have multiple baby handprints, creating a gallery wall can be a beautiful way to showcase them. Mix and match frames of different sizes and styles for an eclectic look.
- Hang it with a ribbon: For a more whimsical display, consider tying a ribbon to the handprint and hanging it on a hook or doorknob. This adds a touch of charm to any room.
Get Creative With Personalized Touches
To make each baby handprint even more special, consider adding personalized touches. Here are a few ideas to get your creative juices flowing:
- Include a handwritten note: Write a heartfelt message or a quote next to the handprint to add a personal and sentimental touch.
- Add embellishments: Use stickers, buttons, or other decorative elements to enhance the visual appeal of the handprint.
- Try different color schemes: Experiment with different colors and patterns to create a unique and eye-catching handprint design.
- Use handprint as a background: Create a collage by using the handprint as a backdrop for other baby-related items such as pacifiers, booties, or toys.
Preserving and displaying baby handprints allows you to hold onto those fleeting moments of your little one’s early years. By following these tips, you can ensure that the handprints remain a cherished treasure that can be enjoyed for a lifetime.
Tips For A Successful Baby Handprint Experience
Discover the top tips for a successful baby handprint experience, including how to get clear handprints using dusting techniques and the best way to apply paint for full coverage. Learn how to make your baby’s hand relax and find the perfect paint for different surfaces.
Be Patient And Take Breaks If Needed
When it comes to getting a baby handprint, patience is key. Babies can be wiggly and unpredictable, making it important to take your time and not rush the process. It’s essential to create a calm and relaxed environment for both you and your little one. Remember, babies can sense stress, so staying calm will help put them at ease.
But what if your baby starts to get fussy or agitated during the handprint session? Don’t worry—take breaks if needed. It’s perfectly normal for babies to have short attention spans and limited patience. If your baby becomes restless or irritable, take a break and try again later. This will help ensure a more successful and enjoyable experience for both of you.
Involve Other Family Members Or Friends
Getting a baby handprint can be a bonding experience not only for you and your little one but for the entire family. Involve grandparents, siblings, or close friends in the process to make it even more special. Having extra hands can assist in keeping your baby calm and secure while you work on capturing the perfect handprint.
Additionally, involving other family members or friends allows for shared memories and meaningful connections. They can witness and be a part of this precious moment in your baby’s life. Encourage them to interact with your baby during the handprint session, making it a joyful and memorable experience for everyone involved.
Capture The Moment With Photos Or Videos
One way to make the baby handprint experience even more memorable is by capturing the moment through photos or videos. These visual mementos will allow you to cherish and relive the memories for years to come.
Before you begin the handprint process, set up a camera or smartphone to record the entire session. Ensure you have enough lighting and a clear view of the area where you’ll be making the handprint. This will help capture each step and emotion, from the preparation to the final result.
Alternatively, you can ask a family member or friend to be in charge of taking photos while you focus on creating the handprint. They can capture close-up shots of your baby’s little hand, as well as candid moments of you and your baby bonding during the process.
Remember, time flies, and babies grow up so quickly. Having photos or videos of the baby handprint experience will allow you to treasure and share these precious moments with your child as they grow older.
Frequently Asked Questions On How To Get Baby Handprint
How To Easily Get Baby Handprint?
To easily get a baby handprint, press their hand onto a smooth surface. Apply lotion beforehand for better visibility. For paint handprints, spread paint evenly on the hand and guide it onto paper or canvas. Use baby-safe paint based on the material.
Massage and relax the baby’s hand to prevent clenching.
How Do You Get Handprints?
To get handprints, press your finger(s) firmly onto a smooth surface. For clearer prints, apply lotion to your hands before pressing. You can also look for accidental prints around the house. When using paint, spread it evenly on the child’s hand, guide their hand onto paper or canvas, press gently, and lift the hand slowly for an actual handprint.
Choose baby-safe paint based on the surface you want to display the handprints on.
How Do You Get Good Paint Handprints?
To get good paint handprints, spread paint evenly over the child’s hand and guide their hand to the desired surface. Gently press down on their hand to leave an actual handprint. Make sure the child holds their hand still and then lift the hand gently.
Can You Use Any Paint For Baby Handprints?
To ensure the safety of your baby, use specific baby-safe paint for handprints on fabric. For paper or card, regular baby-safe paint is suitable.
Conclusion
Getting a perfect baby handprint can be tricky, but with the right techniques, it’s definitely achievable. Whether you’re using dusting for fingerprints or paint handprints, the key is to apply enough pressure and guide the baby’s hand gently onto the desired surface.
Remember to choose baby-safe paint and consider using distractions to make the process smoother. Don’t get discouraged if it takes a few tries before getting that clean stamp of your baby’s handprint. Just keep practicing and soon enough, you’ll have a beautiful keepsake to cherish.