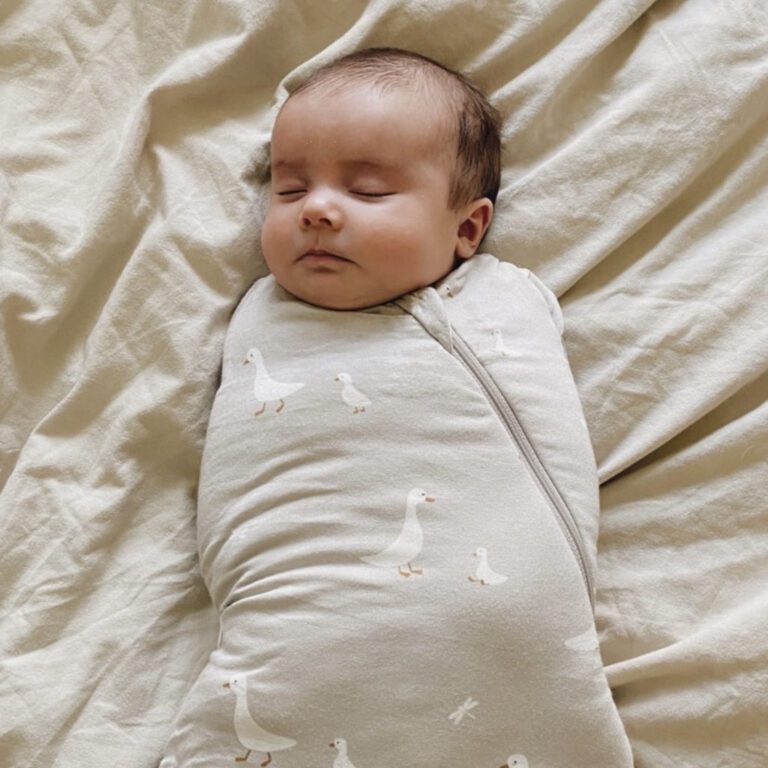
How to Get Newborn Footprints: Easy & Mess-Free DIY Ink Pad
To get newborn footprints, you can use an inkless print kit with detailed instructions for wiping and pressing the baby’s hand onto paper or a keepsake frame. This can be purchased on Amazon or found in stores.
1. Introduction To Diy Ink Pad For Newborn Footprints
Get perfect newborn footprints with our DIY Ink Pad. This easy and mess-free kit allows you to create beautiful keepsakes without touching your baby’s delicate skin. Just follow the simple instructions and cherish those precious moments forever.
Explanation Of The Importance Of Capturing Newborn Footprints
Welcoming a newborn into your family is a momentous occasion that deserves to be cherished. One way to capture the essence of those precious early days is by creating footprints of your little one. These tiny imprints not only serve as a reminder of their adorable size but also hold sentimental value that can be treasured for years to come. Capturing newborn footprints allows you to freeze a fleeting moment in time and create a lasting memory of your baby’s first days in this world.
Overview Of The Diy Ink Pad Method
When it comes to getting newborn footprints, the DIY ink pad method is a popular and convenient choice for many parents. This method allows you to create beautiful and detailed prints using simple materials found in your own home. Instead of relying on professional services or expensive kits, you can easily make your own ink pad using household items like non-toxic ink, baby wipes, and a smooth surface.
The DIY ink pad method offers a cost-effective and hassle-free way to capture your baby’s footprints in the comfort of your own home. By following a few simple steps, you can create professional-looking prints without the need for special equipment or trips to the hospital. Plus, this method gives you the freedom to experiment with different colors and styles, ensuring that each footprint is unique and personalized.
Benefits Of Using A Diy Ink Pad For Newborn Footprints

Using a DIY ink pad for newborn footprints offers a range of benefits that make it a popular choice among parents. Firstly, it provides a safe and gentle option for creating prints without causing any harm or discomfort to your baby’s delicate skin. DIY ink pads are designed to be non-toxic and free from harmful chemicals, ensuring that your baby’s wellbeing is prioritized throughout the process.
Additionally, a DIY ink pad allows for greater customization and creativity. You have the flexibility to choose your preferred ink color and explore different techniques to create unique prints. Whether you prefer a traditional black ink or want to experiment with vibrant, eye-catching colors, the DIY method gives you the freedom to unleash your imagination and create footprints that truly reflect your baby’s personality.
Furthermore, opting for a DIY ink pad means you can conveniently capture your baby’s footprints at your own pace and in the comfort of your home. There’s no need to rush to a hospital or wait for an appointment with a professional. You have the freedom to enjoy the process of creating the prints and take your time to perfect them, ensuring that you achieve the desired results.
In conclusion, the DIY ink pad method for capturing newborn footprints offers an accessible, cost-effective, and personal approach. From the sentimental value of preserving a baby’s tiny feet to the ability to customize and personalize each print, using a DIY ink pad allows you to create lasting memories that will be cherished for a lifetime.

Credit: www.amazon.com
2. Choosing The Right Materials

When it comes to getting your newborn’s footprints, choosing the right materials is essential. It ensures a clean and safe process while creating lasting memories. In this section, we will explore the necessary materials for creating a DIY ink pad and provide tips for selecting non-toxic and safe supplies. We will also recommend some trusted brands and products for DIY ink pads.
Necessary Materials For Creating A Diy Ink Pad
Creating your own ink pad for your baby’s footprints is a cost-effective and fun option. To get started, you will need the following materials:
- A non-toxic ink solution or inkless wipe
- A smooth and sturdy surface, such as a ceramic plate or glass
- A soft sponge or makeup sponge
- A blank, high-quality paper or cardstock
These materials are easily accessible and can be found in local craft stores or online. It’s crucial to ensure that the ink solution or inkless wipe you choose is safe for your baby’s delicate skin.
Tips For Selecting Non-toxic And Safe Supplies
When it comes to selecting non-toxic and safe supplies for your DIY ink pad, keep the following tips in mind:
- Look for ink solutions or inkless wipes that are specifically formulated for baby footprints. These products are designed to be gentle on your baby’s skin.
- Check for certifications such as ASTM D-4236 and AP certified non-toxic. These certifications provide assurance that the product is safe for use.
- Read reviews and recommendations from trusted sources or other parents who have used the products. This can help you make an informed decision about the safety and effectiveness of the supplies.
- Avoid ink solutions or inkless wipes that contain harsh chemicals or irritants. Opt for natural or water-based options instead.
By following these tips, you can ensure that the supplies you choose are safe and non-toxic for your baby’s sensitive skin.
Recommended Brands And Products For Diy Ink Pads
Here are some recommended brands and products that have received positive feedback from parents:
| Brand | Product | Price |
|---|---|---|
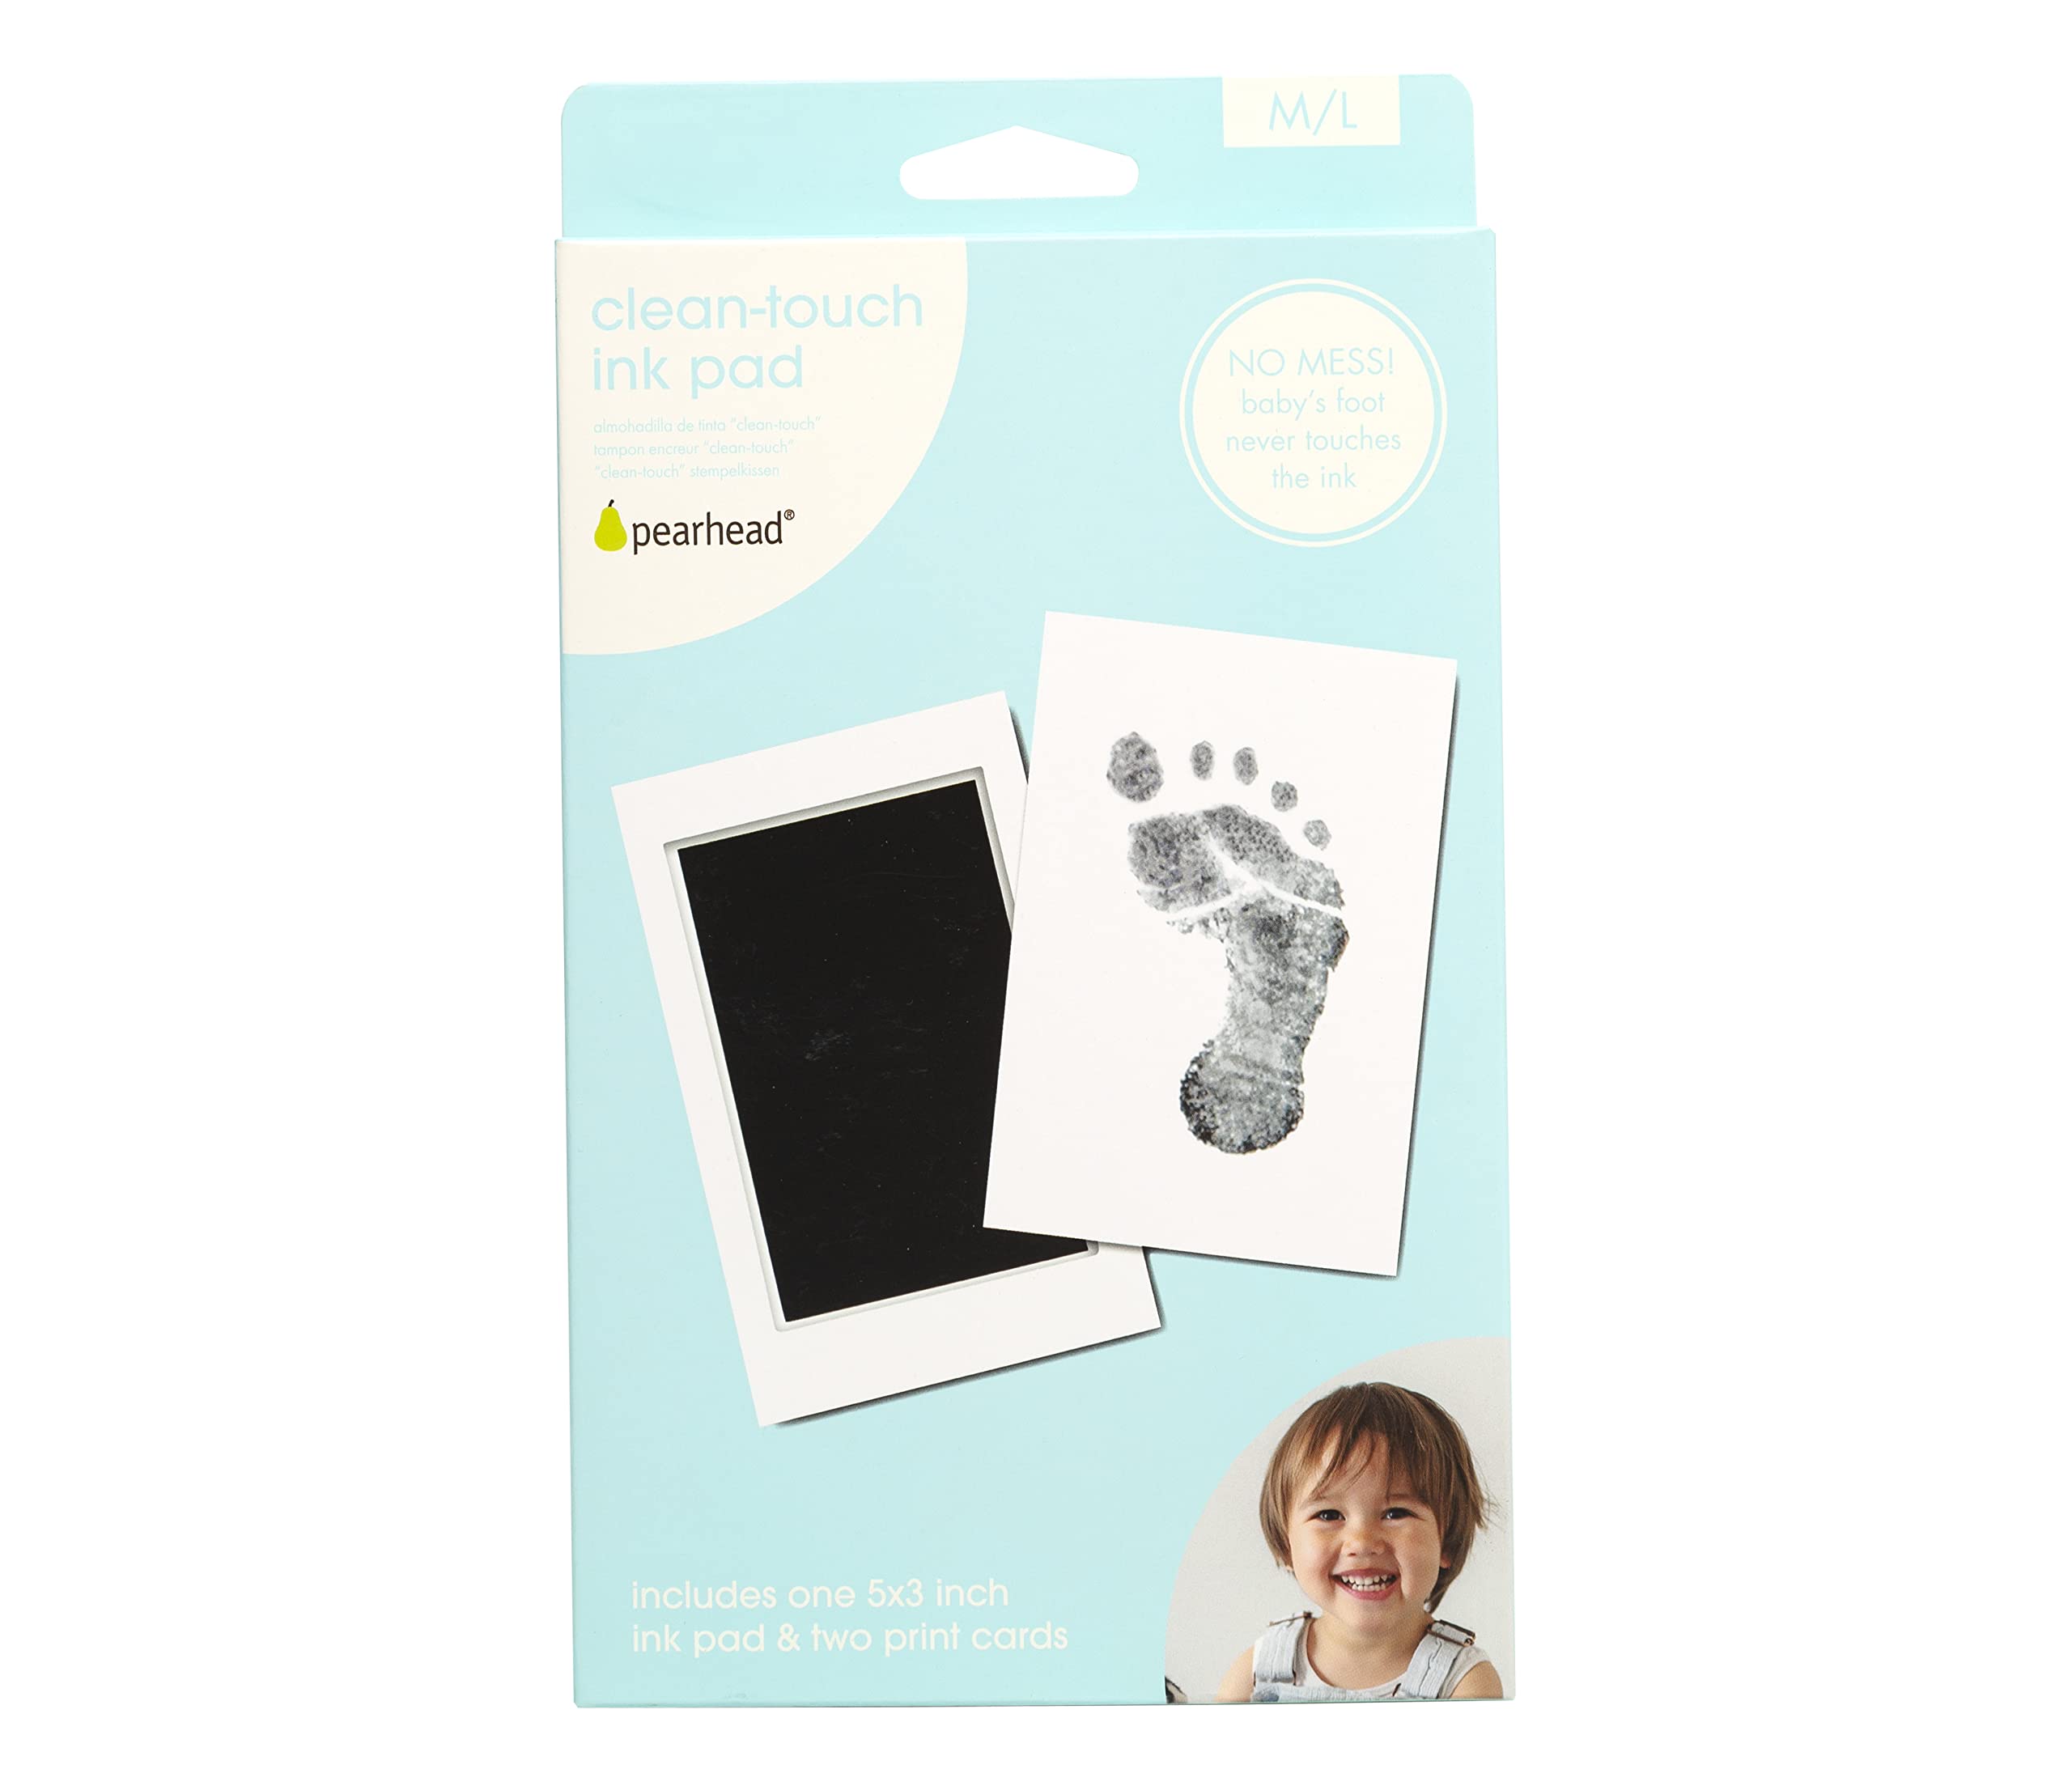
| Clean Touch | Ink Pad for Baby Handprints and Footprints | $7.97 |
| Baby Hand and Footprint Kit | Baby Footprint Kit | $18.96 |
| Inkless Baby Hand and Footprint Kit | Ink Pad for Baby Hand and Footprints | $18.96 |
| Baby Hand and Footprint Kit | Baby Footprint Kit | $18.96 |
| Baby Handprint and Footprint Makers Kit | Keepsake Frame for Newborn Boys & Girls | $23.95 |
| Inkless Baby Hand And Footprint Kit | Ink Pad for Baby Hand and Footprints | $18.96 |
| Baby Hand and Footprint Kit | Baby Footprint Kit | $19.96 |
These products are available on trusted online platforms like Amazon and have received positive reviews for their quality and safety. Remember to choose the one that best suits your preferences and budget.
By selecting the right materials, you can create a DIY ink pad that ensures a safe and enjoyable footprinting experience for your newborn. Now that we have covered choosing the right materials, the next step is the actual process of getting your baby’s footprints. Stay tuned for the next section!
3. Step-by-step Instructions For Creating A Diy Ink Pad
In this section, we will provide you with easy-to-follow instructions on creating your own DIY ink pad. This homemade ink pad will allow you to capture your newborn’s precious footprints without the need for expensive kits or specialized materials. By following these step-by-step instructions, you can create beautiful keepsakes that you will cherish for years to come.
Preparing The Work Area And Gathering Supplies
Before you start creating your DIY ink pad, it’s important to prepare your work area and gather all the necessary supplies. By doing so, you can ensure a smooth and hassle-free process. Here’s what you’ll need:
- A clean, flat surface
- A plastic or glass container with a lid
- Non-toxic ink solution
- A foam sponge or cloth
- Blank paper or a baby footprint card
Mixing The Ink Solution For The Ink Pad
Once you have all your supplies ready, it’s time to mix the ink solution for your DIY ink pad. Follow these easy steps:
- Take the plastic or glass container and pour a small amount of the non-toxic ink solution into it.
- Dip the foam sponge or cloth into the ink solution, ensuring it is fully saturated.
- Make sure to test the ink pad on a spare piece of paper to ensure the color and consistency are to your liking.
Creating A Suitable Surface For The Ink Pad
In order to create a suitable surface for your ink pad, follow these simple instructions:
- Place the foam sponge or cloth soaked in ink solution on a clean, flat surface.
- Ensure that the surface is even and free from any debris or rough edges.
- If needed, you can place a piece of blank paper or a baby footprint card next to the ink pad for easy access and to prevent any mess.
Assembling The Diy Ink Pad
Now that you have prepared the ink solution and created a suitable surface, it’s time to assemble your DIY ink pad:
- Take your baby’s foot and gently press it onto the foam sponge or cloth soaked in ink solution.
- Ensure that the entire surface of the foot touches the ink pad for a clear and defined print.
- Press the foot firmly onto the blank paper or baby footprint card to transfer the ink and create a beautiful footprint.
Troubleshooting Common Issues
If you encounter any issues while creating your DIY ink pad or capturing your baby’s footprints, here are some common troubleshooting tips:
- If the ink is too light or faint, apply more pressure when pressing the foot onto the ink pad.
- If the ink smudges or smears, make sure to press the foot firmly onto the paper without any unnecessary movement.
- If you make a mistake or are unhappy with the print, simply wipe away the ink with a damp cloth and start again.
By following these step-by-step instructions and troubleshooting tips, you can create your own DIY ink pad and capture adorable newborn footprints with ease. Create lasting memories with this simple and cost-effective method for preserving your baby’s milestones.
4. Taking Newborn Footprints With The Diy Ink Pad
Taking your newborn baby’s footprints with a DIY ink pad can be a creative and cherished way to capture these precious moments. Not only are these footprints a wonderful keepsake for parents, but they also make for a unique and personalized gift. In this section, we will guide you through the step-by-step process of taking newborn footprints with a DIY ink pad, ensuring clear and detailed prints every time.
Preparing The Baby For Footprint Taking
Before you begin the process, it is essential to ensure that your baby is comfortable and calm. Here are a few tips for preparing your baby for footprint taking:
- Gently wash and dry your baby’s feet to remove any dirt or excess moisture. This will ensure better ink adhesion and a cleaner print.
- Choose a quiet and well-lit space where you can comfortably position your baby for the footprint taking process. Having a familiar and soothing environment can help keep your baby relaxed.
Proper Positioning And Application Of Ink On The Baby’s Foot
Getting the positioning and application of ink on your baby’s foot right is crucial for achieving clear and detailed footprints. Follow these steps for proper positioning and ink application:
- Ensure that your baby’s foot is relaxed and not curled up. Gently hold the foot and position it at a slight angle, allowing the heel and toes to make full contact with the ink pad.
- Take the DIY ink pad and carefully press it against the baby’s foot, ensuring complete coverage of the ink on the foot. Use a rolling motion to make sure all the creases and contours of the foot are inked.
Pressing The Foot Onto The Ink Pad And Transferring To Paper
Now that the foot is properly inked, it’s time to press it onto the paper and transfer the footprint. Here’s how to do it:
- Place a clean and smooth sheet of paper next to the ink pad. Lightly hold your baby’s ankle and guide it down onto the paper, ensuring that the entire foot makes contact.
- Apply gentle pressure on the baby’s foot, ensuring an even transfer of the ink onto the paper. Hold it in place for a few seconds before carefully lifting the foot away.
Tips For Achieving Clear And Detailed Footprints
To achieve clear and detailed footprints, keep the following tips in mind:
- Choose a high-quality DIY ink pad that is non-toxic and safe for baby’s delicate skin. This will ensure better ink transfer and minimize the risk of any allergic reactions.
- Take your time and be patient during the process. Rushing can result in smudged or blurred prints.
- Practice a few times on a scrap piece of paper before working on the final print. This will help you get comfortable with the technique and achieve a better result.
Cleaning The Baby’s Foot And The Ink Pad After Use
Once you have successfully taken your baby’s footprints, it’s important to clean their foot and the DIY ink pad. Follow these steps for proper cleaning:
- Gently clean the baby’s foot with a wet cloth or baby wipes to remove any excess ink. Be careful not to use harsh chemicals or scrub too vigorously, as it can irritate their sensitive skin.
- For the DIY ink pad, follow the manufacturer’s instructions for cleaning. Most DIY ink pads can be wiped clean with a damp cloth or baby wipe. Make sure to remove any excess ink before storing it for future use.
By following these steps and tips, you can successfully create beautiful newborn footprints with a DIY ink pad. These footprints will serve as a timeless reminder of your baby’s tiny feet during those precious early days.
5. Display And Preservation Of Newborn Footprints
Looking for ways to get newborn footprints? Check out these easy and mess-free options available on Amazon, such as clean touch ink pad kits and baby hand and footprint kits. Capture your baby’s precious footprints and create lasting memories.
Once you have successfully captured your little one’s adorable footprints, it’s time to explore creative ideas for displaying them. Additionally, you’ll want to consider options for preserving these precious imprints for years to come. Incorporating your newborn’s footprints into nursery decor can also add a personal touch to the space. Lastly, there are additional ways to use the DIY ink pad for crafts and keepsakes beyond just capturing those sweet little footprints.Creative Ideas For Displaying Newborn Footprints
When it comes to displaying your baby’s footprints, the possibilities are endless. Here are a few creative ideas to inspire you:- Create a shadow box display: Frame the footprints along with a newborn photo and any other memorable items, such as the hospital bracelet or a lock of hair.
- Design a custom artwork: Use your baby’s footprints as a template to create personalized artwork, such as a canvas painting or a framed print.
- Make a photo album: Include your baby’s footprints alongside precious photos in a dedicated baby photo album.
- Decorate a onesie: Use fabric markers or fabric paint to transfer your baby’s footprints onto a plain onesie, creating a unique piece of clothing.
Options For Preserving Footprints Long-term
Preserving your newborn’s footprints ensures that you can cherish this special memory for years to come. Here are a few options to consider:- Choose a keepsake frame: Select a frame specifically designed to showcase your baby’s footprints, creating a lasting memento.
- Create a ceramic keepsake: Use a clay or plaster kit to make a lasting impression of your baby’s footprints, which can be displayed on a shelf or mounted on a wall.
- Invest in a customized jewelry piece: Many companies offer jewelry that can incorporate your baby’s footprints, such as pendants or charms, allowing you to carry this precious memory with you wherever you go.
Tips For Incorporating Footprints Into Nursery Decor
Adding your baby’s footprints to the nursery decor is a lovely way to personalize the space. Consider these tips for seamless integration:- Create a gallery wall: Frame your baby’s footprints along with other meaningful artwork or photos to create a charming gallery wall in the nursery.
- Incorporate footprints into wall decals: Find customizable wall decals that allow you to include your baby’s footprints as part of the design.
- Use footprints as a border: Paint or stencil your baby’s footprints along the top or bottom of the walls to create a unique border effect.
Additional Ways To Use The Diy Ink Pad For Crafts And Keepsakes
The DIY ink pad used to capture your baby’s footprints can serve multiple purposes. Here are a few additional ways to utilize it:- Create personalized greeting cards: Use the ink pad to add handprints or footprints to homemade greeting cards for loved ones.
- Add footprints to a memory box: Use the ink pad to capture footprints and add them to a memory box filled with special keepsakes from your baby’s first year.
- Design custom wrapping paper: Make your own unique wrapping paper by stamping your baby’s footprints onto plain gift wrap.
Frequently Asked Questions For How To Get Newborn Footprints
How Do You Take A Newborn’s Footprint?
To take a newborn’s footprint, open up their fingers and tickle the palm of their hand to encourage them. You can also use an inkless print kit or clay to capture the footprint.
How Do I Get My Newborn’s Handprints?
To get your newborn’s handprints, follow these steps: 1. Open up the baby’s fingers and tickle the palm of their hand to encourage them. 2. Use an inkless wipe to thoroughly wipe the baby’s hand. 3. Press the baby’s hand down on a clean surface to create the handprint.
4. Repeat the process for each hand. 5. Frame the handprints or add them to a baby keepsake book.
Do Hospitals Give You Baby Footprints?
Hospitals do offer baby footprints for parents.
What Kind Of Paint Do You Use For Baby Footprints?
You can use clean touch ink pad or inkless baby hand and footprint kits to safely create baby footprints. These are available on Amazon. com.
Conclusion
Capturing newborn footprints is a special way to cherish the early moments of your baby’s life. With simple techniques and the right tools, you can create beautiful keepsakes that will be treasured for years to come. From using inkless kits to imprinting their tiny feet on paper or clay, the options are endless.
Whether you want to display the footprints in frames or create a personalized baby book, getting newborn footprints is both easy and memorable. So, go ahead and celebrate your baby’s arrival with these precious mementos.